The SecuSwitch Dashboard
The Management System for Administrators
The SecuSwitch Dashboard is available on your local network. It allows you to manage users and your environment. For security reasons, it is not allowed to be called from outside. A secure connection to your network (VPN) allows remote access.
The SecuSwitch Log stores all relevant events:
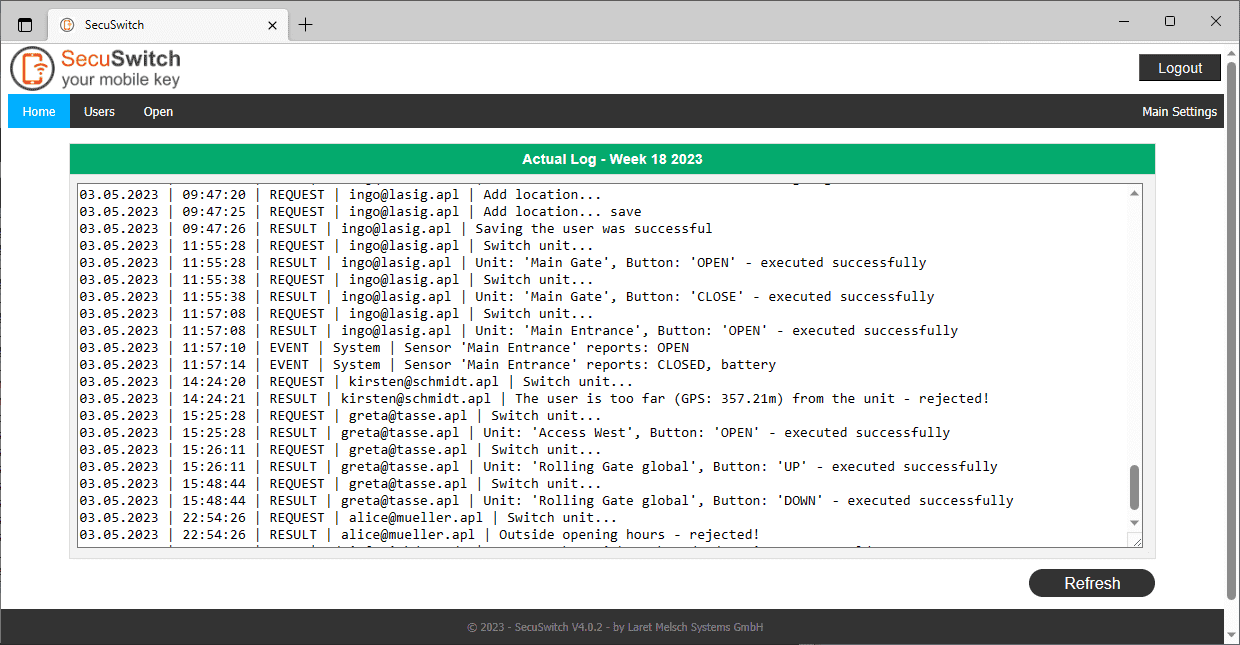
The SecuSwitch log is created weekly and archived in a folder shared with you. In the basic settings, you can specify whether and which persons should automatically receive a copy of the log via e-mail. The log in SecuSwitch is unchangeable and audit-proof.
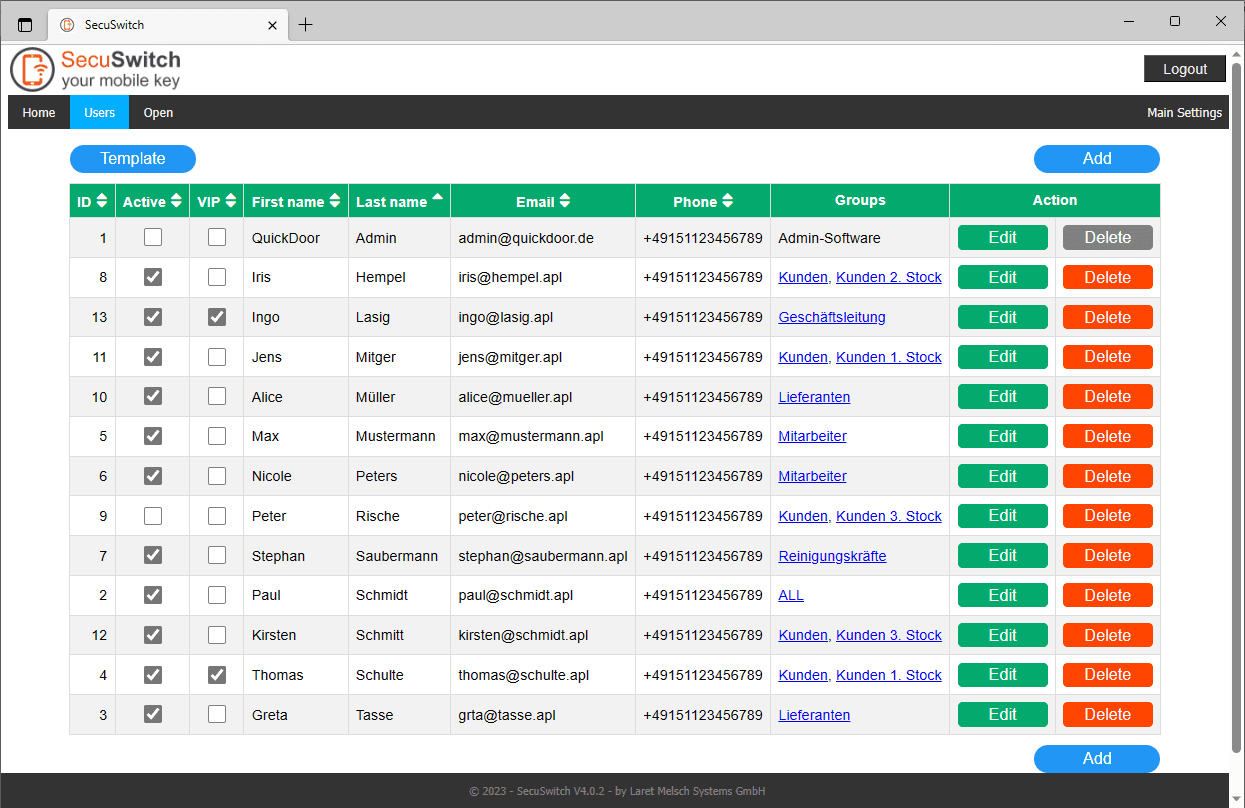
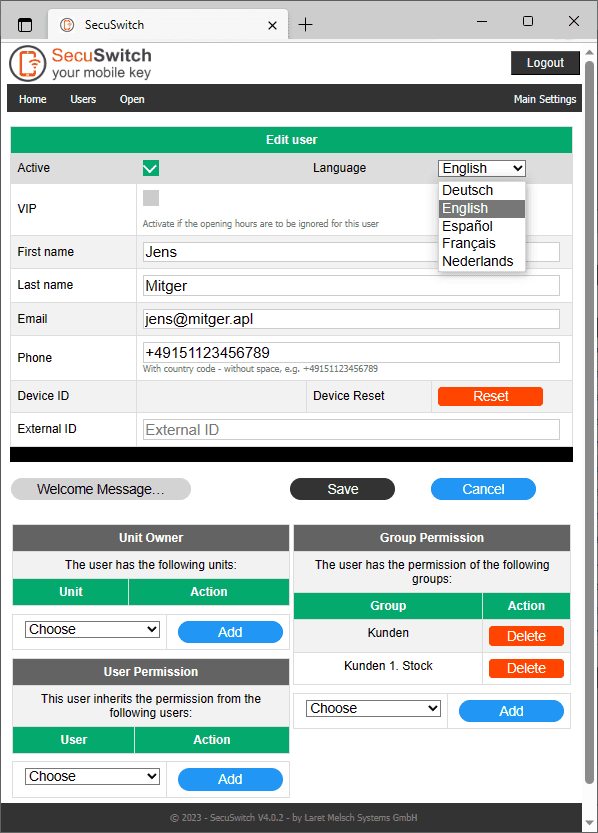
The User Management
The overview shows you a tabular representation of all users and the group permissions. In the detailed view you can edit users – activate/deactivate, reset an access, manage the authorization, etc.
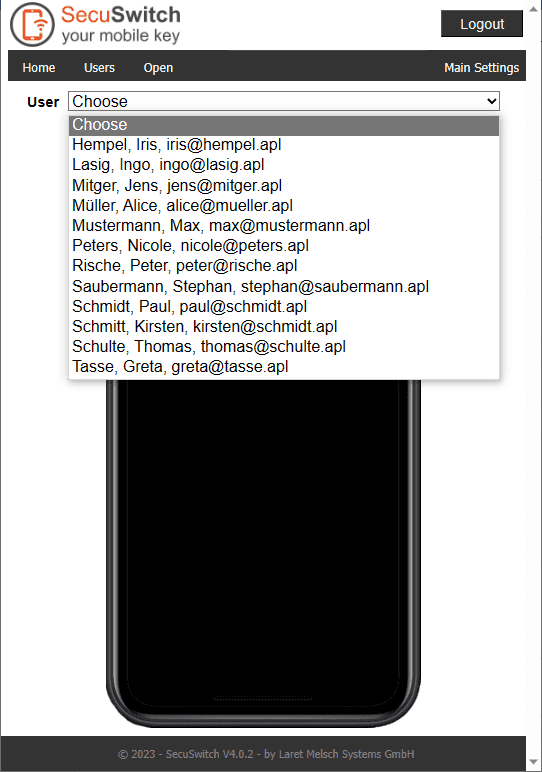
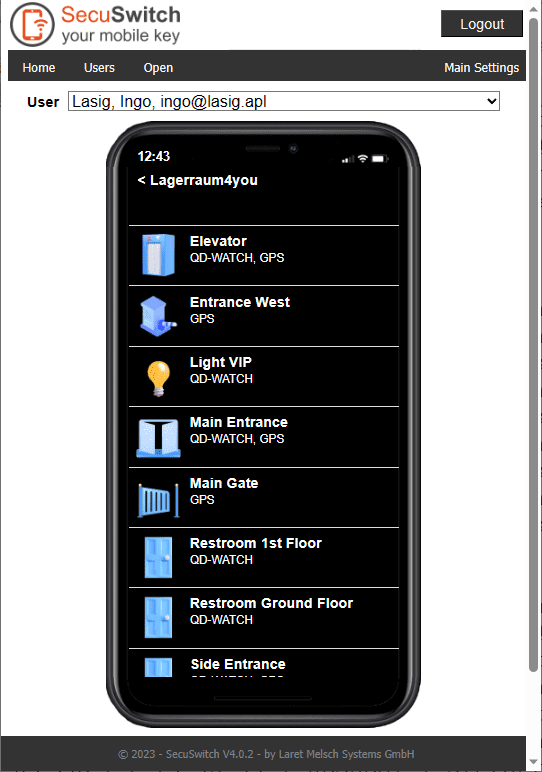
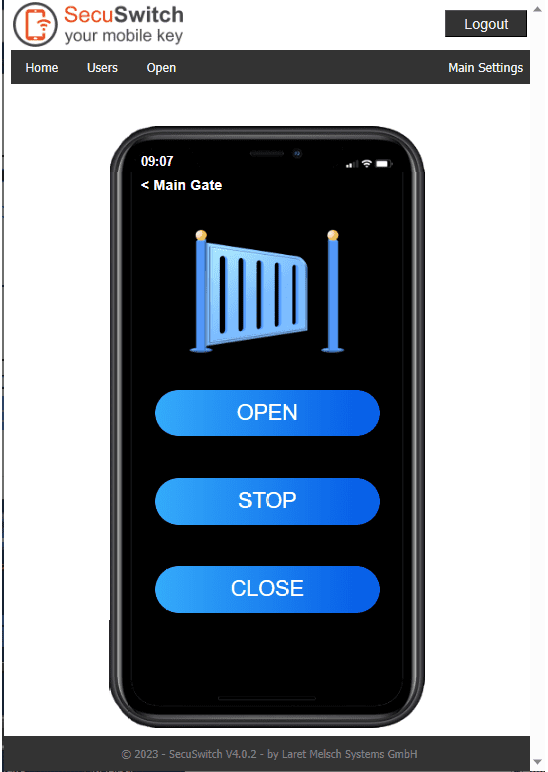
The App Emulator
Following the SecuSwitch App you can visualize the UNIT authorization for each user. Furthermore, you can also operate the UNITS, which is also stored in the log.
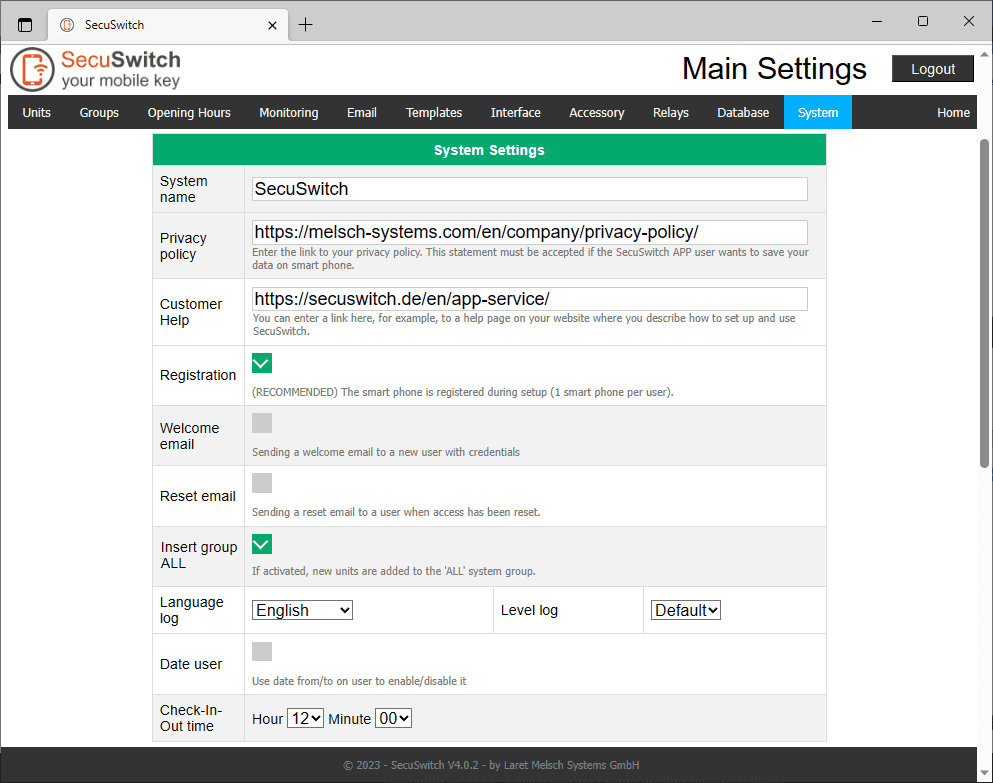
The SecuSwitch Main Settings
This area is used to set up the basic settings and is not or very little used during operation. We are happy to support you with the main settings.
SecuSwitch Unit
SecuSwitch works with UNITS, which you can create yourself once. Basically, a UNIT represents one thing – a room or compartment, an access or entrance, a lighting or a time recording. You can use a created UNIT to:
- Control relays, or
- automatically grant an owner of this UNIT the permission of one or more groups
Point 2 is used, for example, to map self-storage buildings. This means that even if the boxes to be rented inside the building are not controlled electrically with SecuSwitch, each box is created as a UNIT in SecuSwitch. Then you can assign a group to each UNIT – e.g. “Customers”. The group “Customers” is authorized to use all UNITS that allow access to the building.
Example configuration of a UNIT: Entrance East
You connect an electric lock to a relay. The “buzzer” should allow 4 seconds to open.
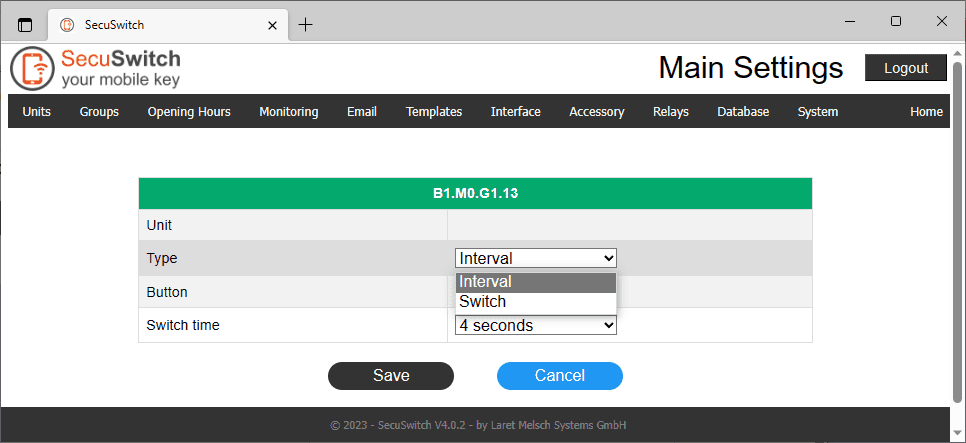
Since it should switch off automatically after 4 seconds, ‘Interval’ and ‘4 seconds’ are selected.
Step 2) Create a new UNIT and define the UNIT according to your needs:
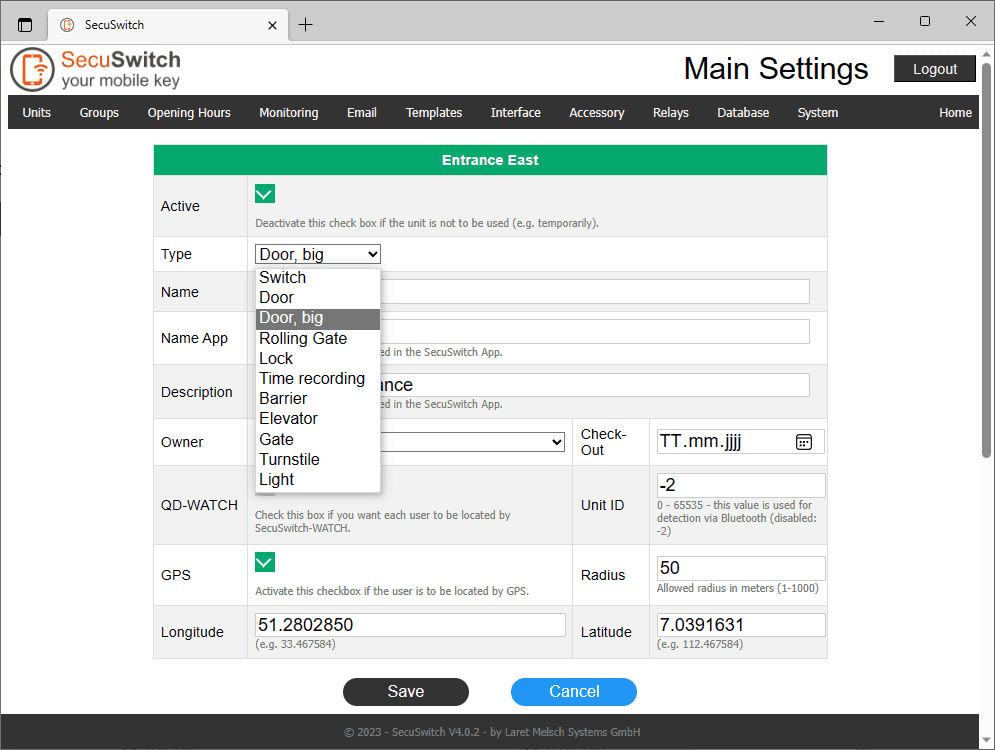
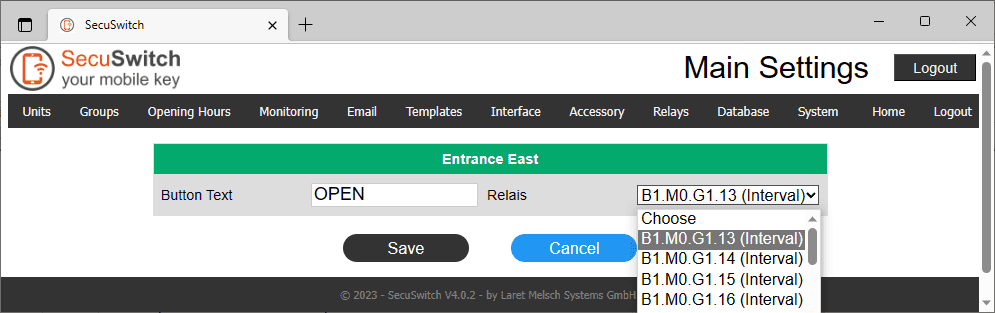
Assign a name for the button and select the previously set relay (here B1.M0.G1.13). Up to 3 buttons can be defined in one UNIT.
Done!
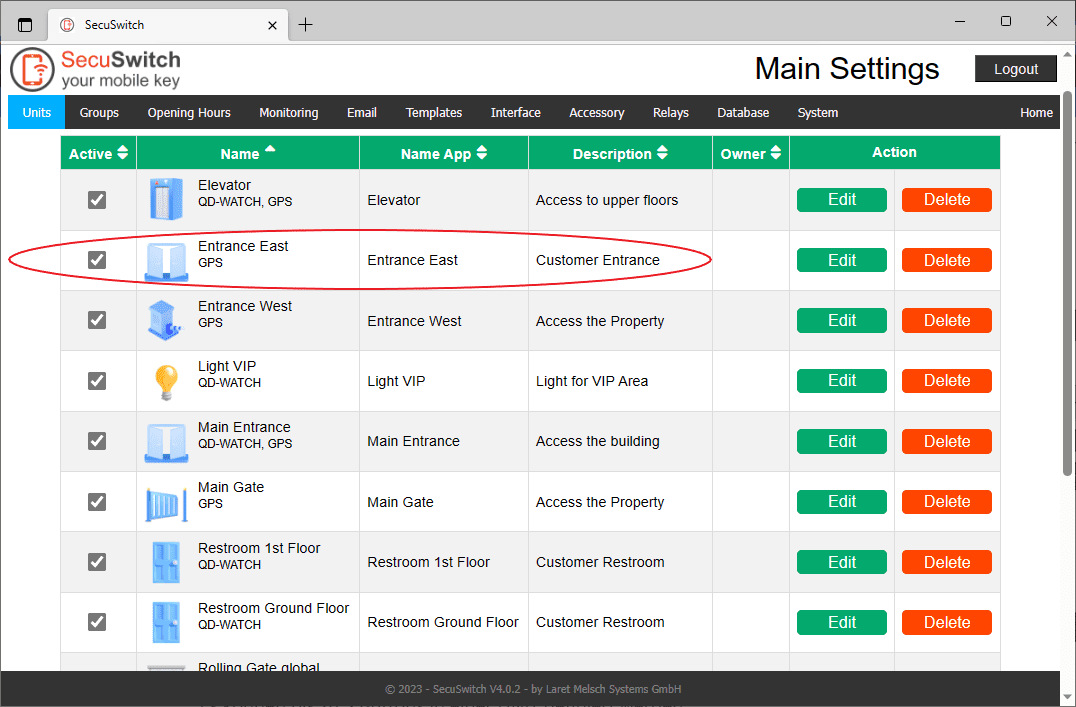
The new UNIT has been created and can be found in the overview:
Additional Main Settings
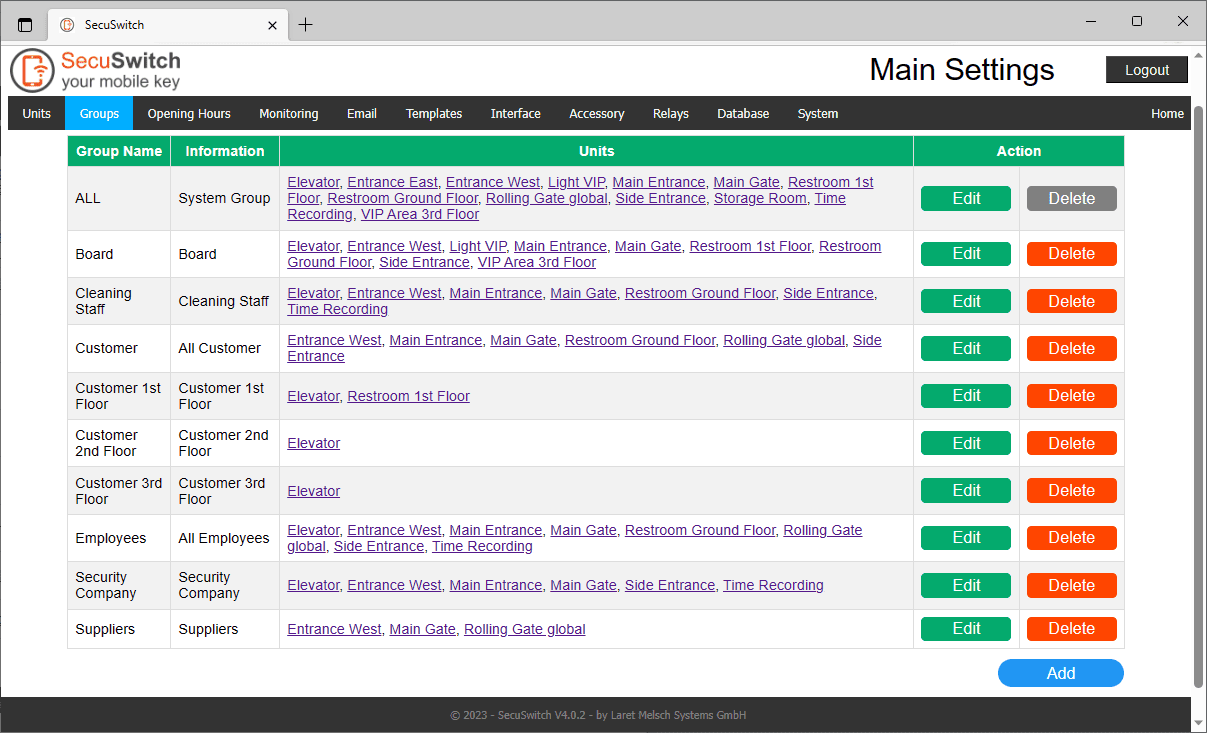
Groups
Create groups for an authorization for UNITS. You can assign these groups a) to users and/or b) to a UNIT, so that an owner (e.g. tenant) of this UNIT automatically gets the permission of a group:
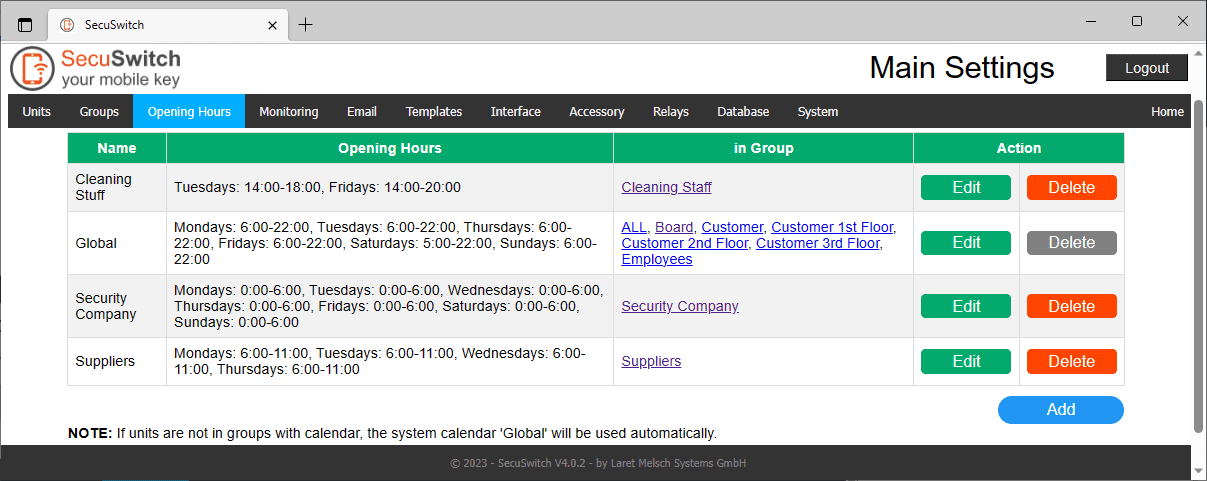
Business hours
Create different opening hours that you assign to one or more group(s):
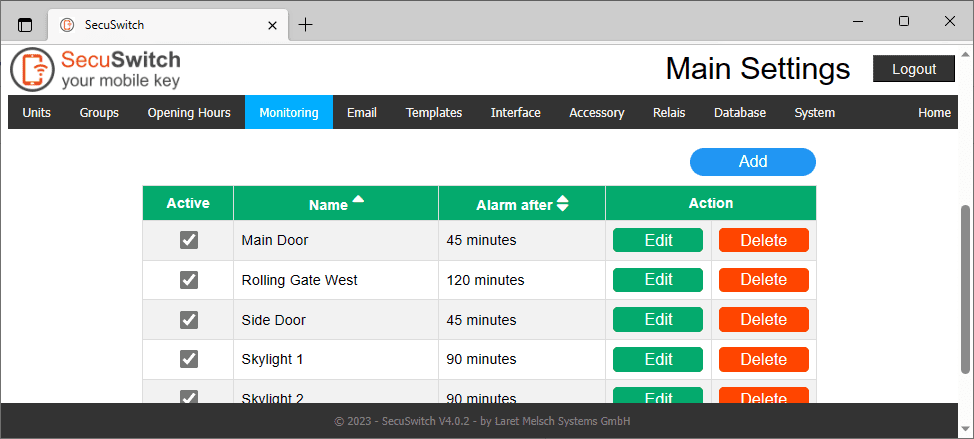
Monitoring and Alarming
If you use external contacts for monitoring windows, doors and/or gates, you can create them here:
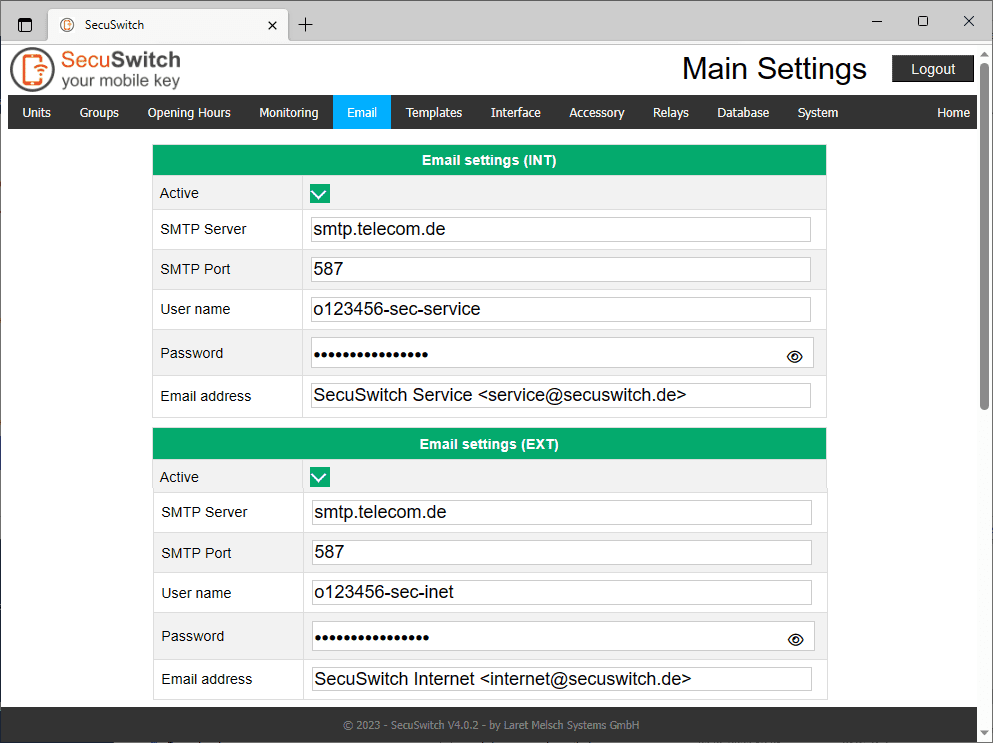
Enter email accounts for automatic sending of e-mails by SecuSwitch. A distinction is made between sending ‘internal’ (e.g. sending log files and database backups) and ‘external’ (welcome message, reset message):
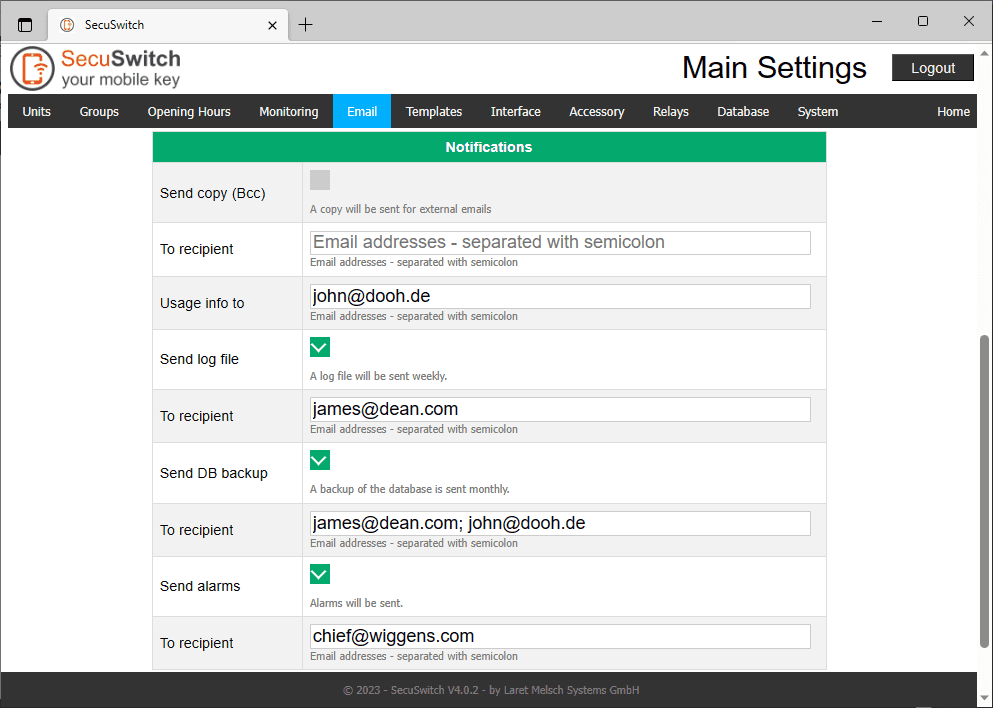
Under ‘Notifications’ you decide if and who should automatically receive emails from SecuSwitch. This is usually you as the operator or your employees.
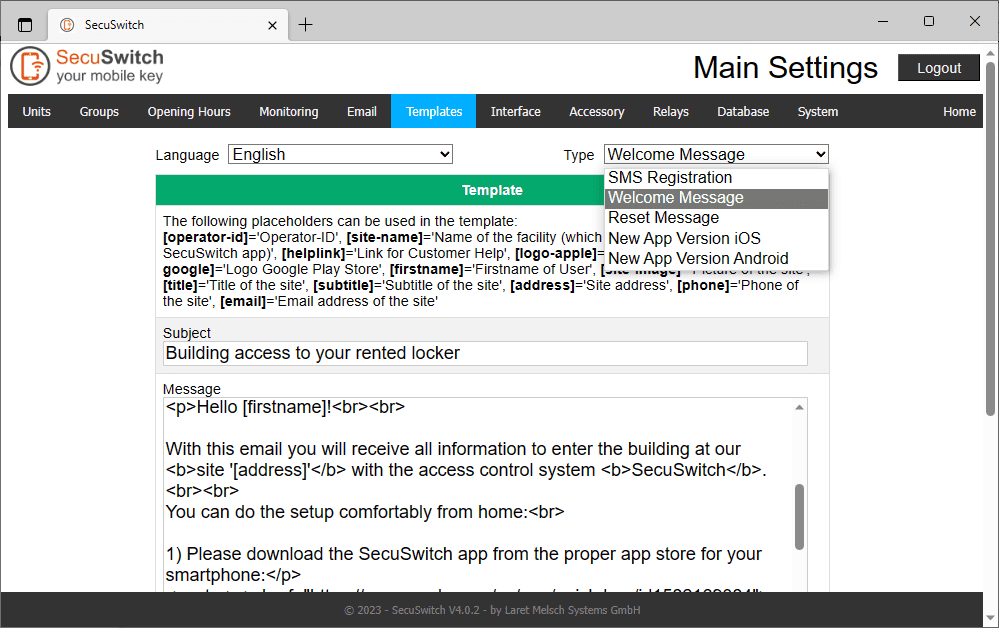
Templates
Personalize your templates for sending SMS and Emails automatically:
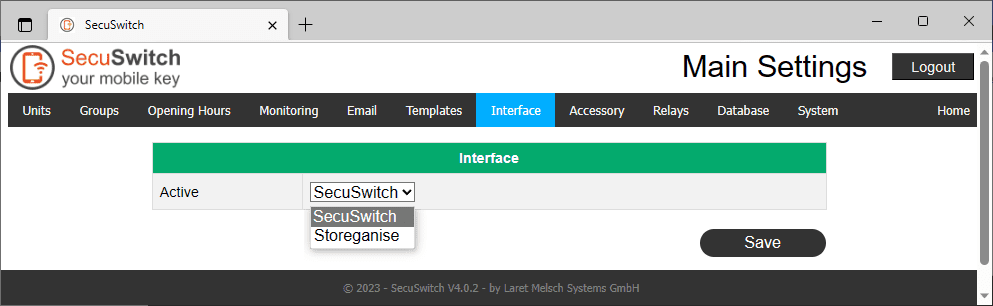
Interfaces
Set the interface to external systems:
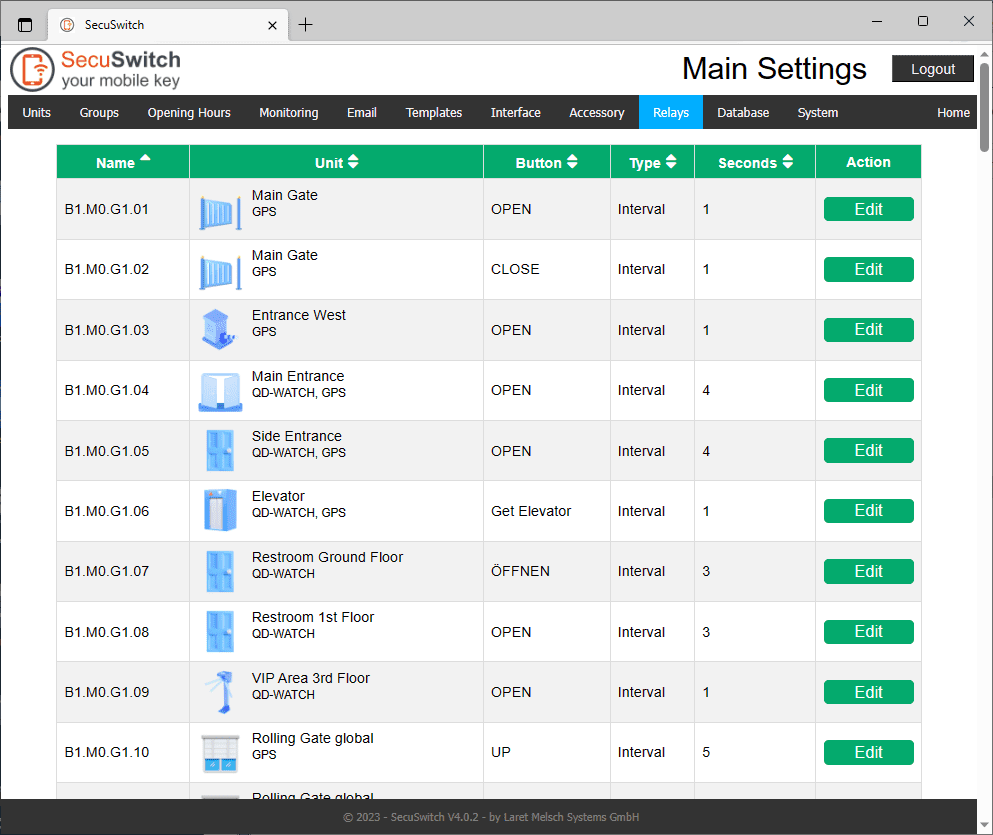
Relays
Overview of used and unused relays as well as an editing of the settings:
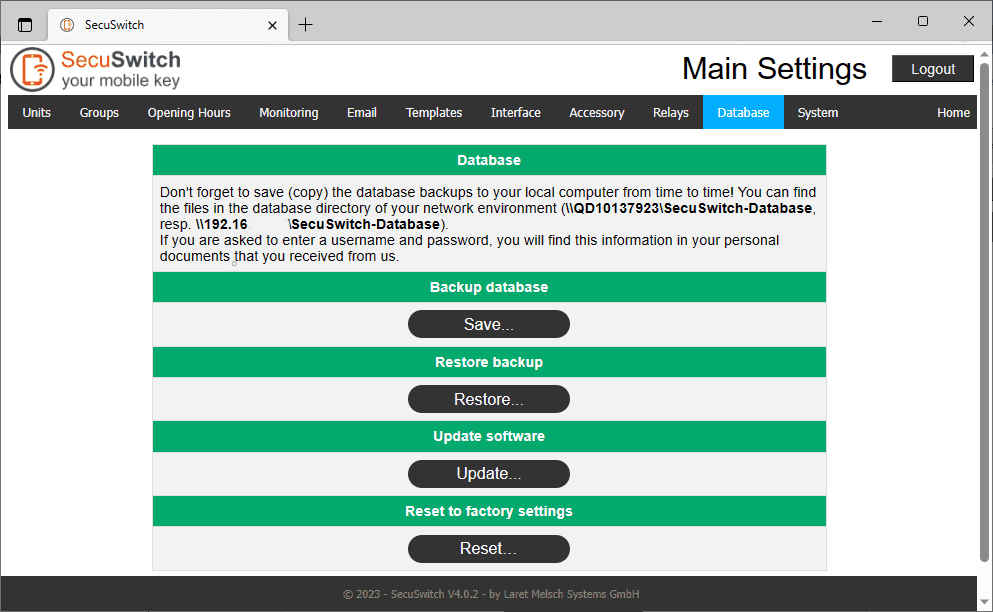
Database
Backup and restore your environment:
System
Individualize SecuSwitch in the main settings of the system: