Seamless integration with Storeganise
Storeganise is a comprehensive software solution for self-storage and valet storage management. A customer portal is at the same time a ready store through which customers of self-storage operators can book, as well as manage bookings, invoices and payments independently.
With an intuitive GUI, you can manage multiple locations, compartments, move-ins and move-outs, and get an instant overview of each location’s occupancy with a customizable site map.
For more information visit Storeganise.

>The SecuSwitch interface to Storeganise can be set up in just a few minutes. After that, all information relevant to that location is stored locally in Secuswitch and updated automatically. This includes:
- Location information (name, address, coordinates)
- Units (description and status)
- User (name, language, mobile phone number, status)
The update of the SecuSwitch-HUB is event-driven:
- Storeganise informs SecuSwitch about changes (webhooks)
- In addition, the communication is checked at intervals and automatically updated in case of changes
Setting up the Interface in 5 Steps
During setup, all information such as user details and units that you have already set up in Storeganise are automatically exported and stored locally. In the SecuSwitch basic settings, you will also need to create UNITS for those things that are NOT known to Storeganise and will later be controlled via the SecuSwitch App. These include, for example:
- an electric gate for access to the property
- Access into the building
- Possibly Lighting
Site Configuration
For the following description of the setup, we assume the following configuration. Furthermore, you have already made the settings in Storeganise (API key generated, custom fields added).
- Access to the property with a barrier**
- Building with 2 floors
- 41 units (20 x on 1st floor, 21 x on 2nd floor)
- Building access (door) 1st floor**
- Building access (elevator) 2nd floor**
- 6 units in 2nd floor with electric rolling gates**
- Restrooms (access from the outside)**
- Office room (staff only) 1st floor**
- Time recording for external security (documentation of presence)**
** Controlled by SecuSwitch
Step 1) Create UNITS in SecuSwitch
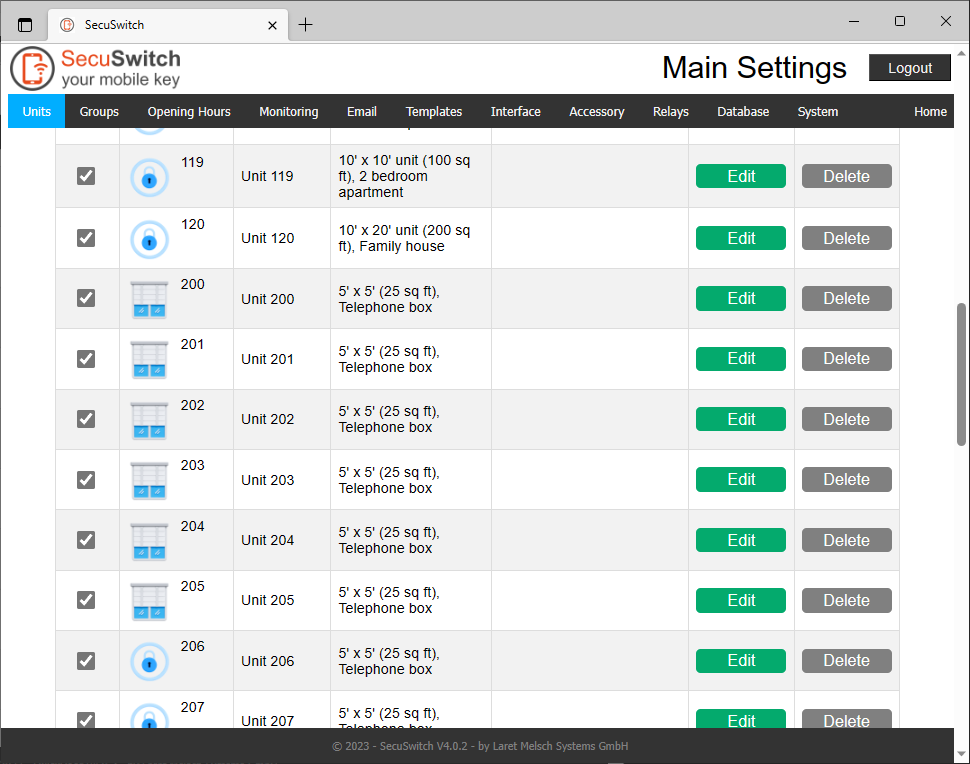
Add UNITS and define ‘Buttons’ that will be used to switch in the SecuSwitch App. The selected symbols, the name and description of the UNIT, as well as the ‘Button’ text will be displayed in the SecuSwitch App.
Note: In the App, only UNITS are displayed that are also controlled – i.e. contain ‘buttons’!

Step 2) Create groups and assign UNITS:
The comprehensive authorization system allows you to control access to UNITS according to your requirements.
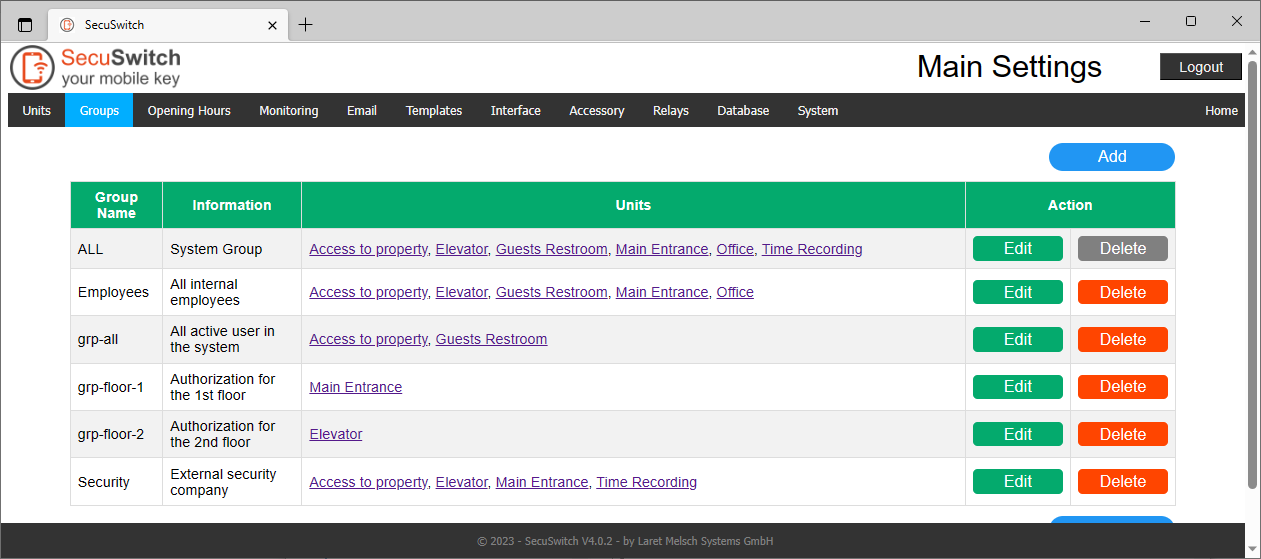
Note: You can also assign different business hours to each group.
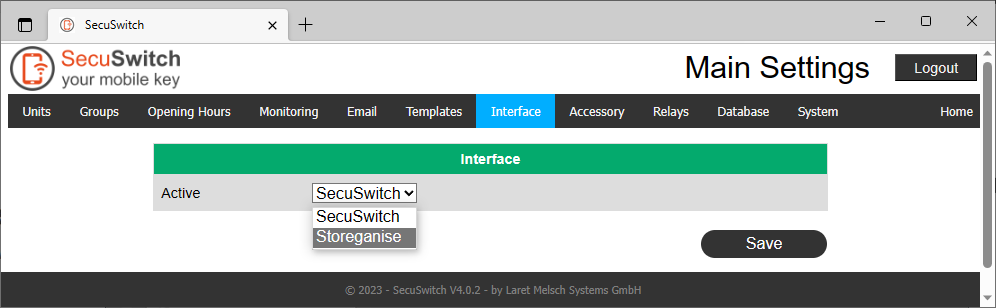
Step 3) Activation of Interface
Select Storeganise as the interface and save the settings.
Enter the URL to your store and insert the API key. For more information, see the Storeganise description. Select the default language you use in Storeganise and save the entry.
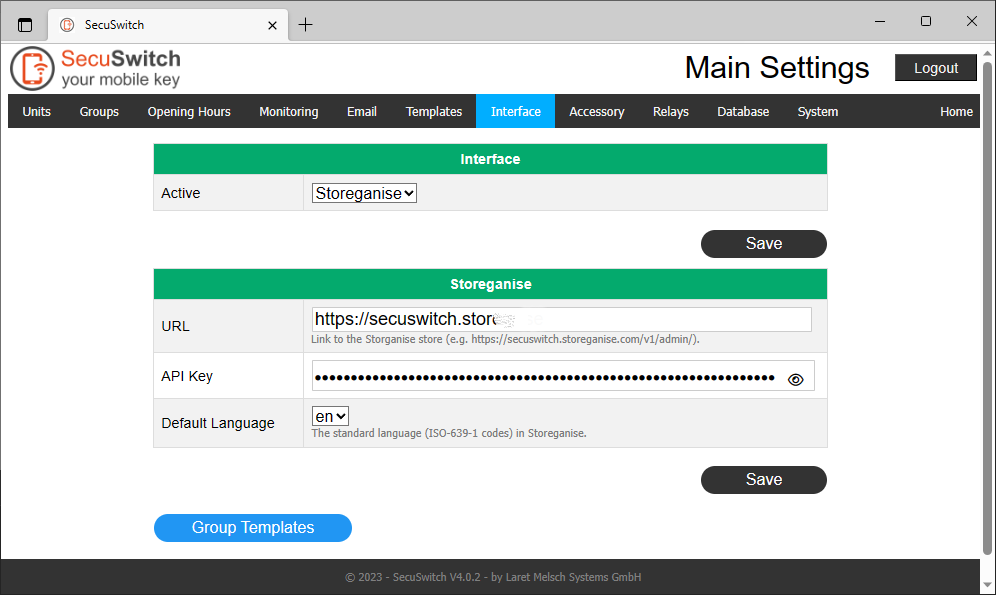
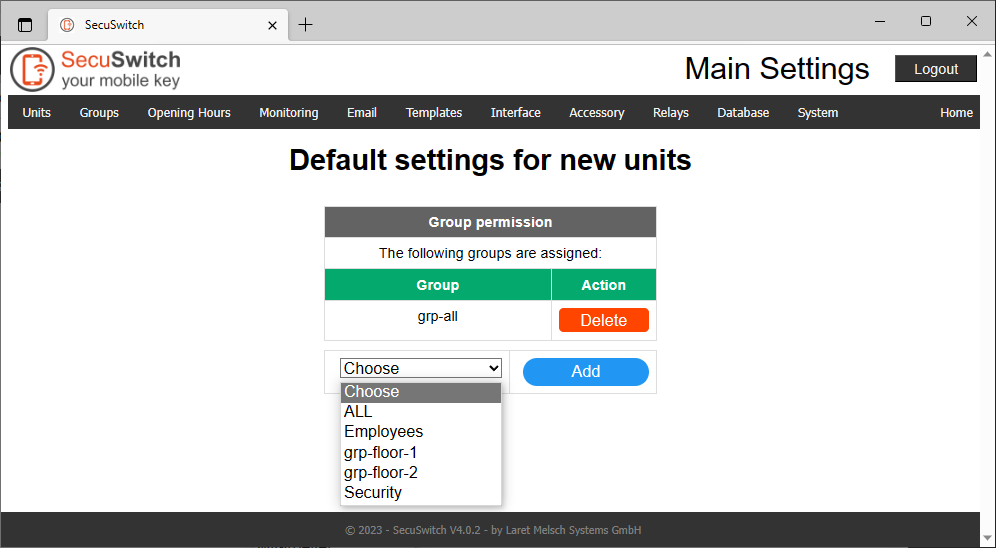
Under ‘Group Templates’ you can select groups that will be added once to the new UNITS during the first setup. You can change the settings at any time in the UNITS.
SecuSwitch connects to Storeganise after saving. Select the location where this SecuSwitch-HUB is installed. Set the other settings according to your requirements. Save the settings and restart the SecuSwitch-HUB.

Note: Under ‘Title for App Name’ you can put a text of the name in Storeganise in front (Unit or Box).
After the restart, the system will be updated with all relevant information.
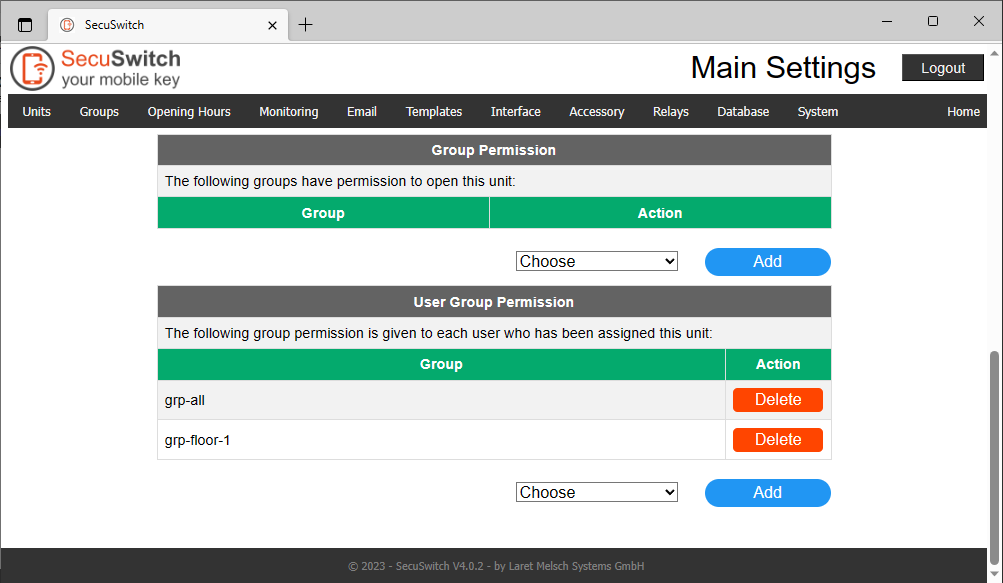
Step 4) Complete authorizations of the Units
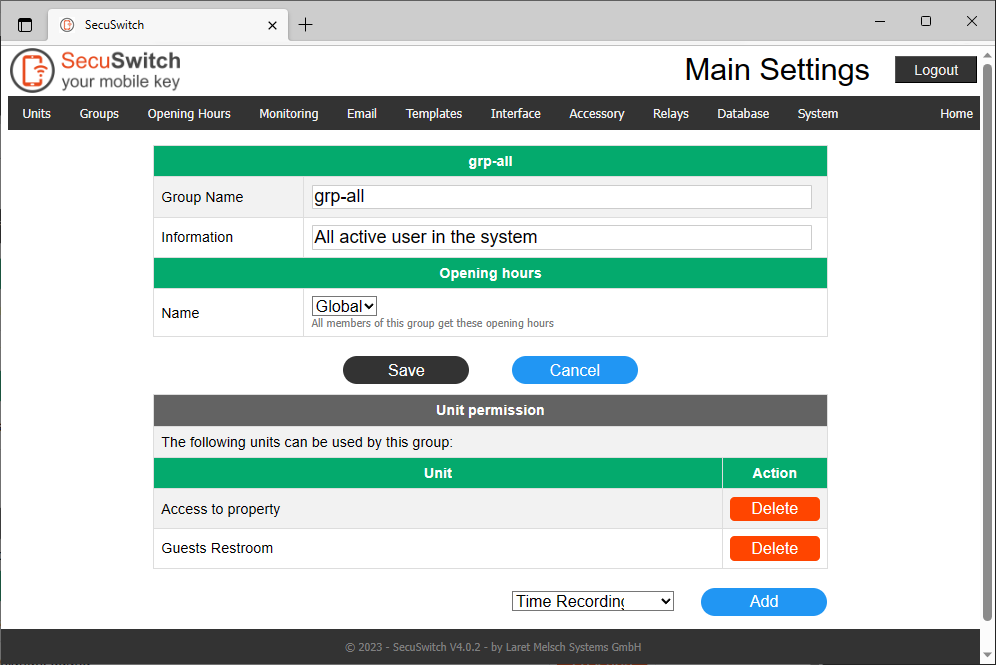
All Units have been automatically assigned the group ‘grp-all’. This gives each tenant of a unit the authorization for the UNITS ‘Access tp property’ and ‘Guests Restroom’. Now the previously created groups for the floors are additionally assigned to the units:
We additionally assign the group ‘grp-floor-1’ to each unit of the 1st floor:
We additionally assign the group ‘grp-floor-2’ to each unit of the 2nd floor:
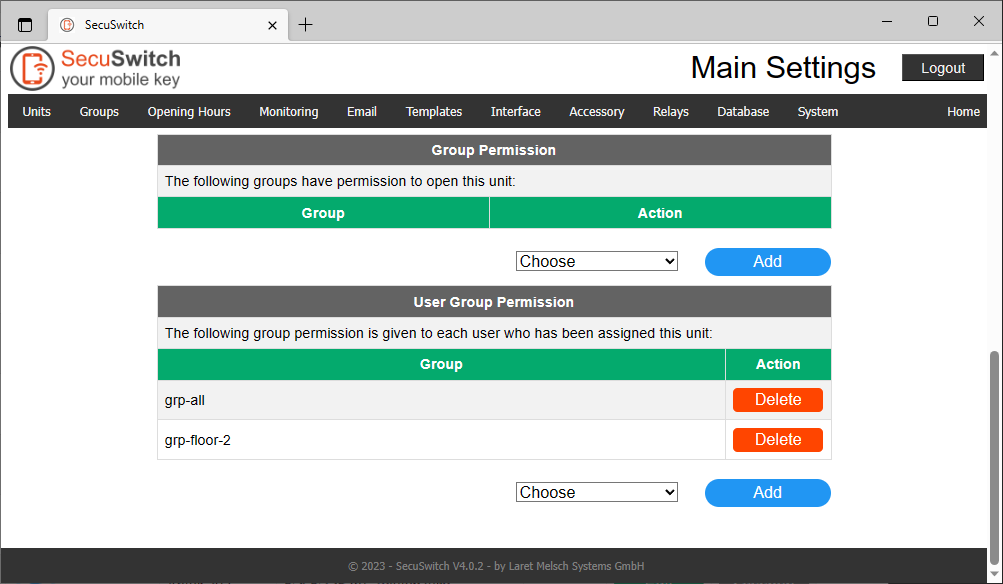
This ensures that a tenant of a compartment always has the required rights to control the UNITS via the SecuSwitch App.
Step 5) Control of the 6 Rolling Gates
Relays (buttons) are assigned to each of the 6 units to control the rolling gates in the future.

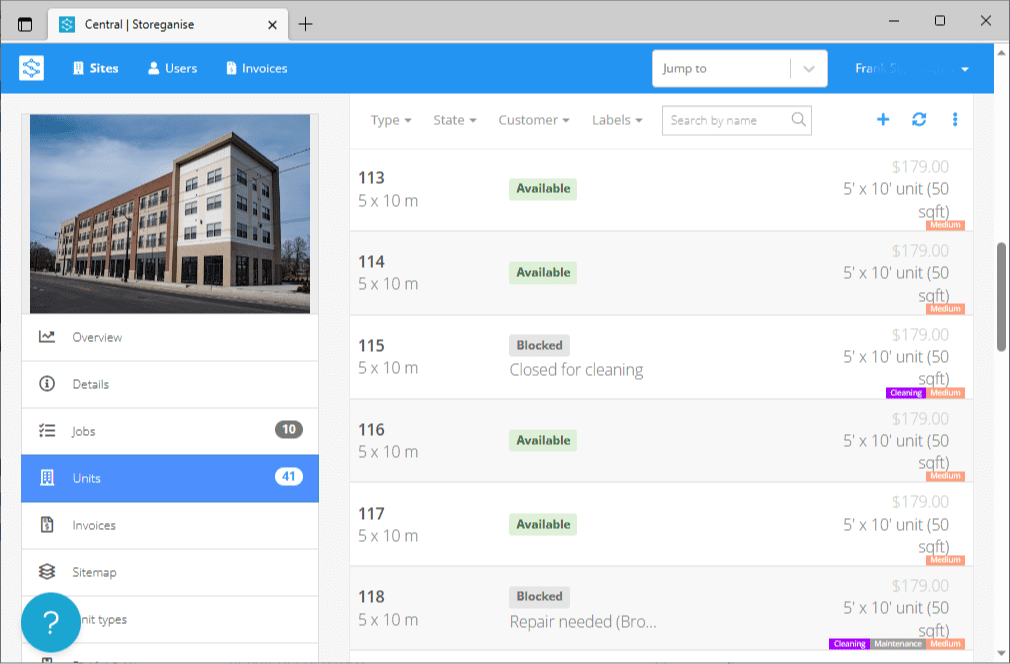
All UNITS are displayed in the overview. You can make changes at any time.
Done!
All settings are completed. SecuSwitch updates itself automatically. Complete control is now handled by Storeganise. Accessing the SecuSwitch Dashboard is no longer necessary for operation.
Use the SecuSwitch group authorization in Storeganise
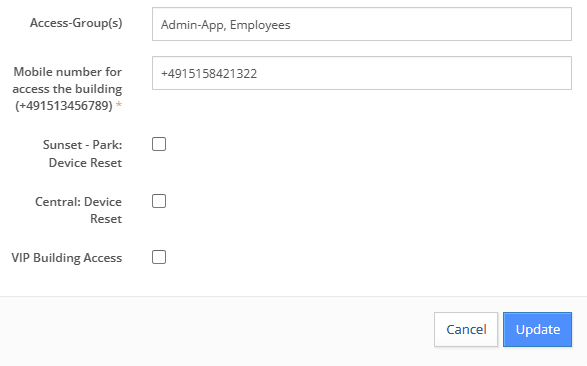
For integration with Storeganise, only a few “custom fields” need to be added in Storeganise. For users who are not tenants (e.g. you as an operator/manager in Storeganise or for your employees), the “Access Group(s)” field can be used to grant authorization of SecuSwitch groups to these users via Storeganise.
Webhooks in Storeganise
Create ‘Webhooks’ in Storeganise to notify SecuSwitch when there are changes in Storganise. SecuSwitch receives these webhooks and updates the SecuSwitch system. Please refer to the respective documentation for detailed information on ‘Webhooks’. We will be happy to assist you with the settings.